

Winter Experiments: Update & Results
Here are the results of the experiments! What did we end up with??


Guys! It’s been a while! What a crazy winter it has been, work at the day job really got busy and kept me from a lot of things. I’m so glad to be back though! Here is the long-overdue update to our Winter Experiments series! Were you waiting on bated breath?? Well, maybe not really, but still, here is an update for those interested.
To recap: Experiment #1 was the dried seaweed ferment, and Experiment #2 was with the paramagnetic rooting substrate. Experiment #3 was the particles rooting substrates. Experiment #4 was all about natural growth stimulants. Last but not least was Experiment #5, the 50/50.
Experiment 1: Dried Seaweed Ferment
After about 4 days, I noticed it had some mold growing on the surface. It’s not unusual to get some mold on a ferment, especially when the materials are not remaining submerged below the liquid. This can happen when making FAA too and the answer is usually either more sugar or ignore. I chose to not worry about it because I knew that the EM-1 bacteria would eventually take over.
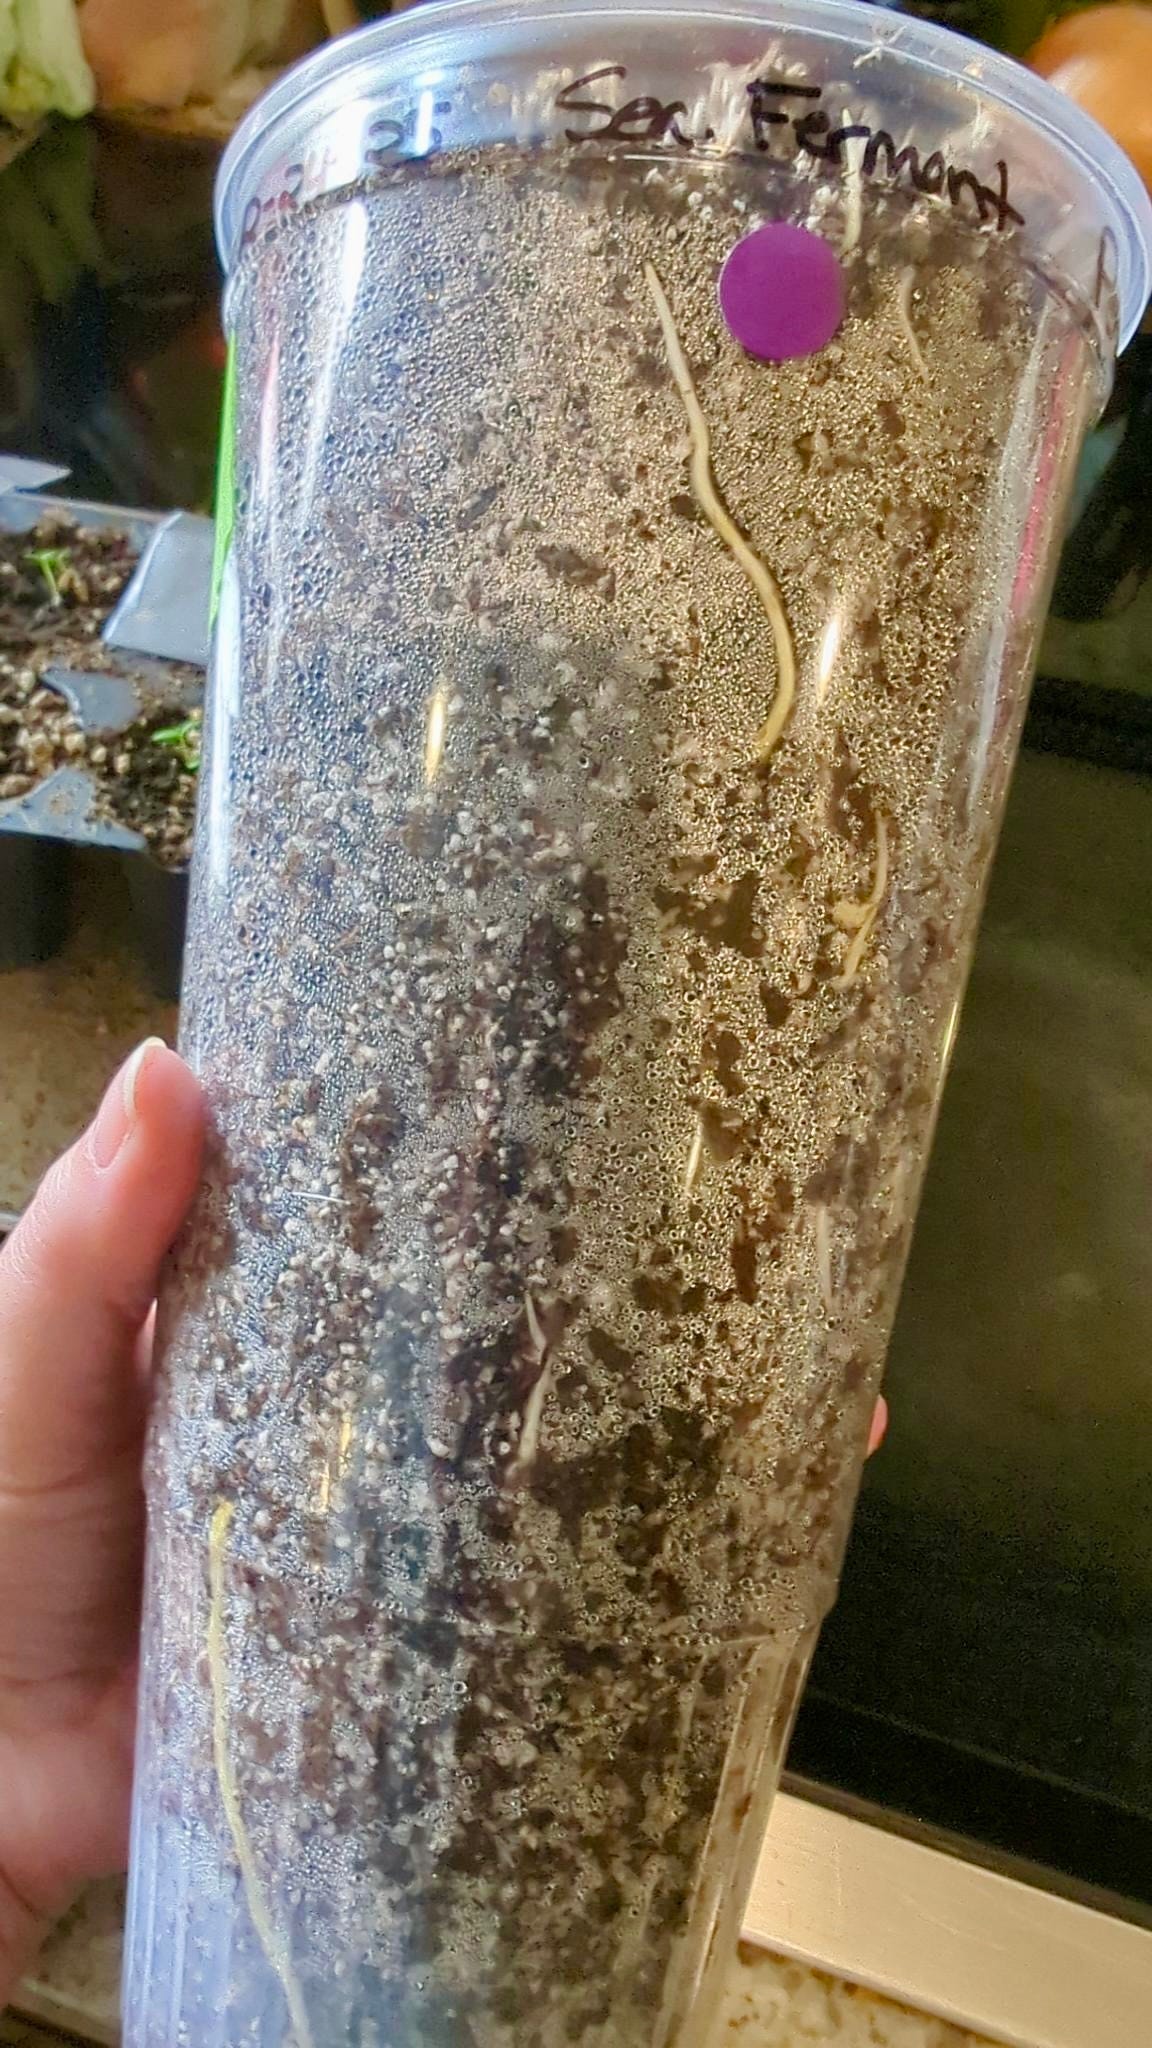
Here it is 2 weeks in:
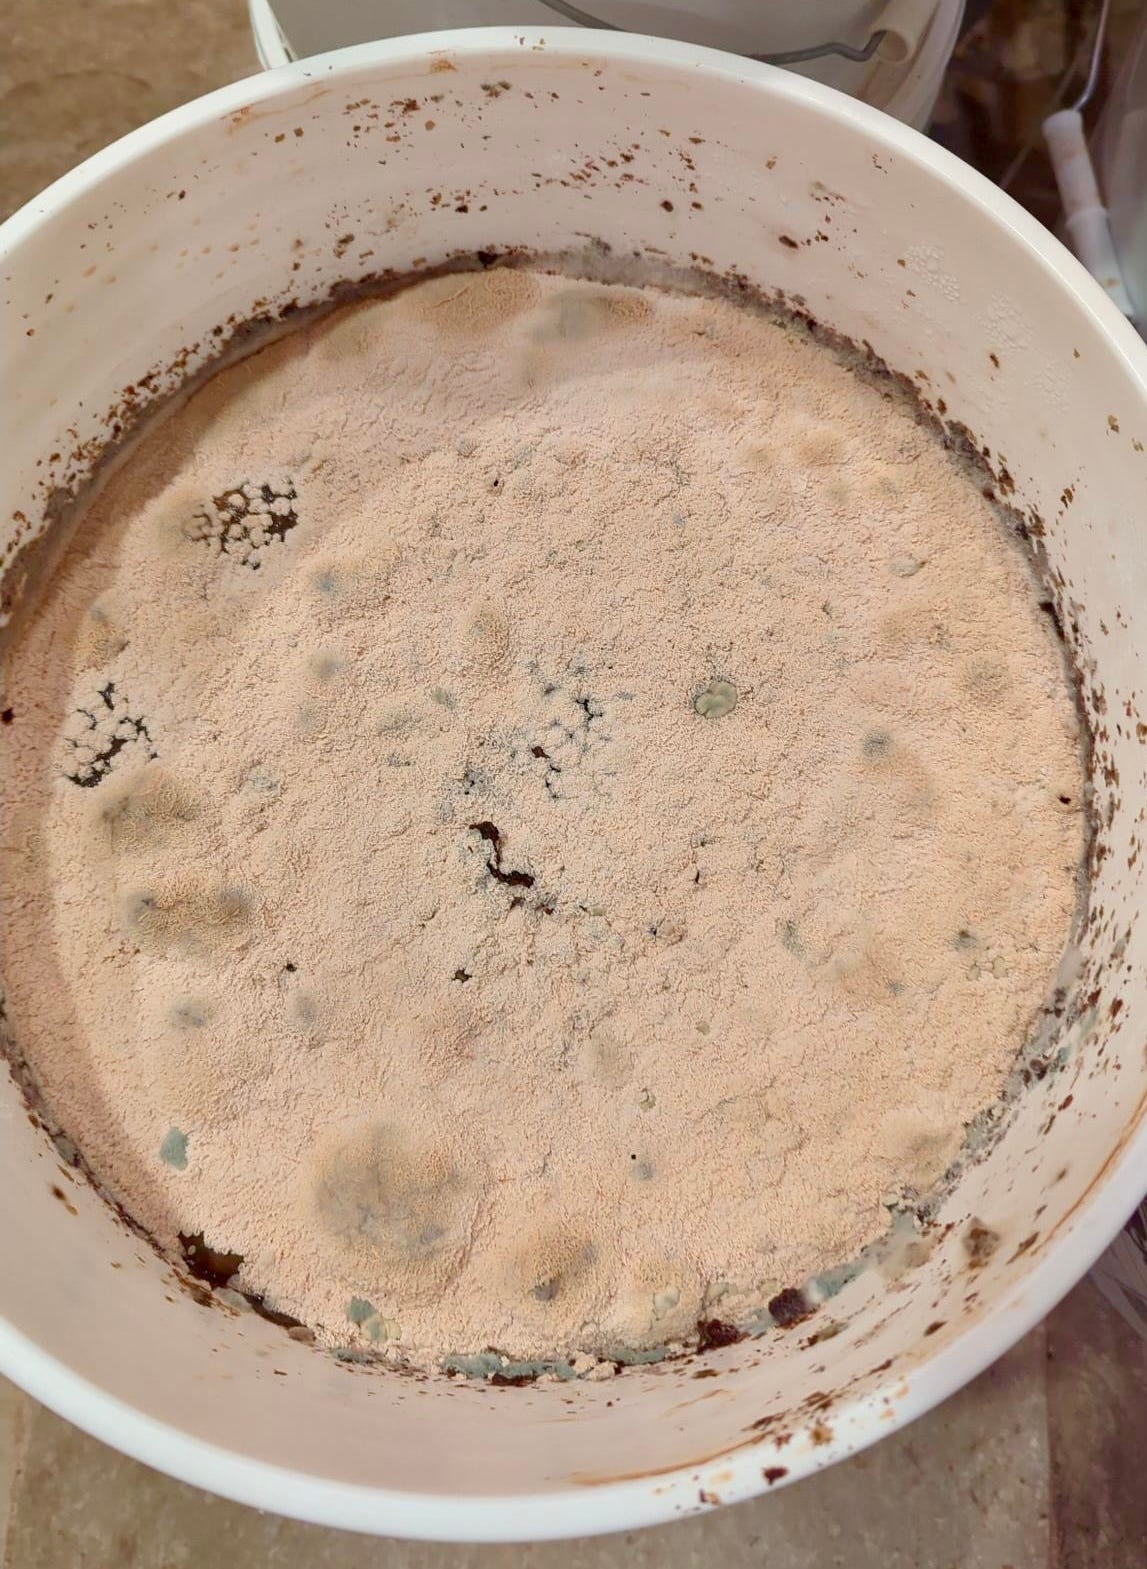
What you are seeing above is not all mold! It is the EM-1 pellicle, (some call it a scoby, it is such if it contains yeast and becomes more of a solid gelatinous mass,) with some patches of mold, mostly around the sides and on the side of the bucket where I splashed up mixing it and didn’t wipe it clean afterwards. The green-gray spots are mold.
I did add in about 8 cups more water with a dollop of blackstrap molasses added because it was gel-like under the scoby and I wanted it more liquidy.
Here it is exactly 1 month later:
You can still see the EM-1 pellicle. The majority of the mold is gone. The darker spots are where the pellicle is more transparent and the color of the liquid underneath is showing through. The picture doesn’t show the differences very well. But in the first picture with mold, there were greenish, fuzzy spots. This one does not have that anymore. It smells a little yeasty, a little fermenty — it smells ready to use.
I ended up loving this ferment! I was so shocked as I wasn’t expecting much from it. But it has performed so well, it is a great one and I don’t think I will be buying seaweed fertilizer ever again. This was so easy to make! I decided not to decant it, but to take from it as needed and to keep adding in bits of molasses to keep it LAB based so it doesn’t turn to alcohol or vinegar. I’m not sure how long that will last or if it is ideal, but I want to extract everything I can from the seaweed.
Because I loved it so much, it led to… ↓↓↓
Dried Seaweed Ferment #2
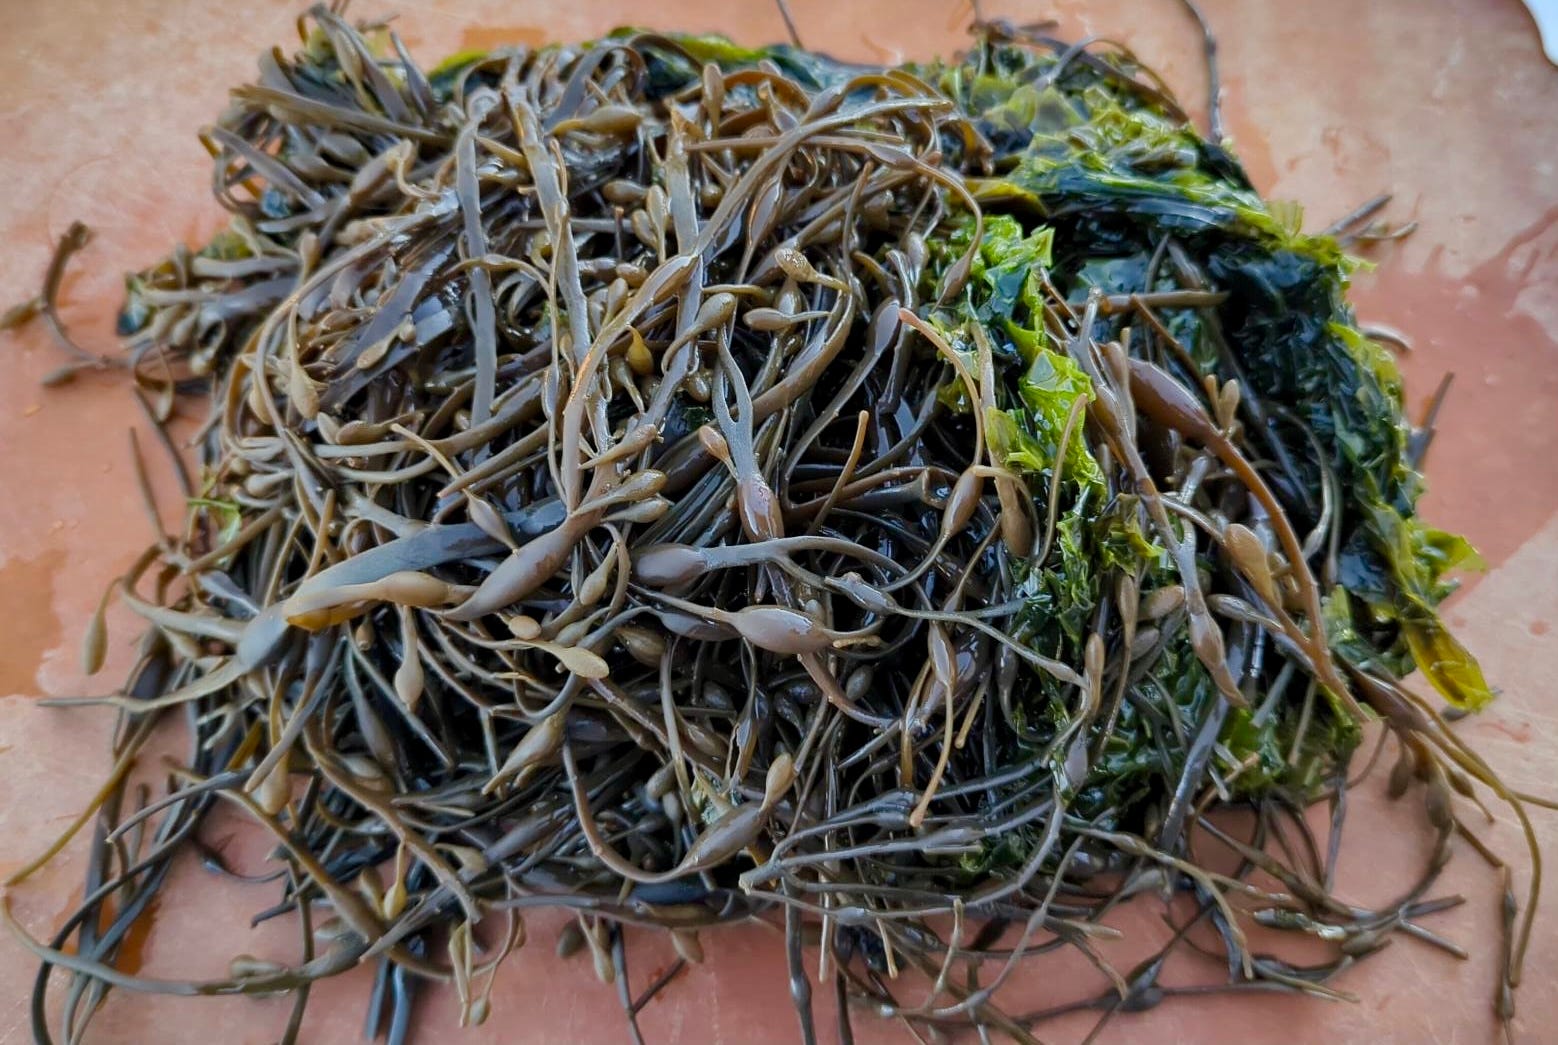
I did decide to make another ferment with the dried whole pieces of seaweed (2 lbs dried). I had dried rockweed and sea lettuce that I covered with water and let rehydrate for 24 hours. This stuff was incredible— it smelled briny and fresh from the ocean. I did pour off the soaking water in this case, it smelled just like ocean water, but was kind of cloudy and dirty looking. I originally intended to chop up the seaweed into 1-inch pieces. But the rockweed was tougher than expected, so I just roughly chopped it. I could have pulled out my food processor, but I really did not want to go to that much effort with the larger amount I had, especially since it can be hard to control particle size with it. I have also heard that in cases where you are getting fresh seaweed from the beach, you can chop it up by laying it on a lawn and running a lawn mower over it. I do not have a lawn though, so that option was out. So big pieces it is!
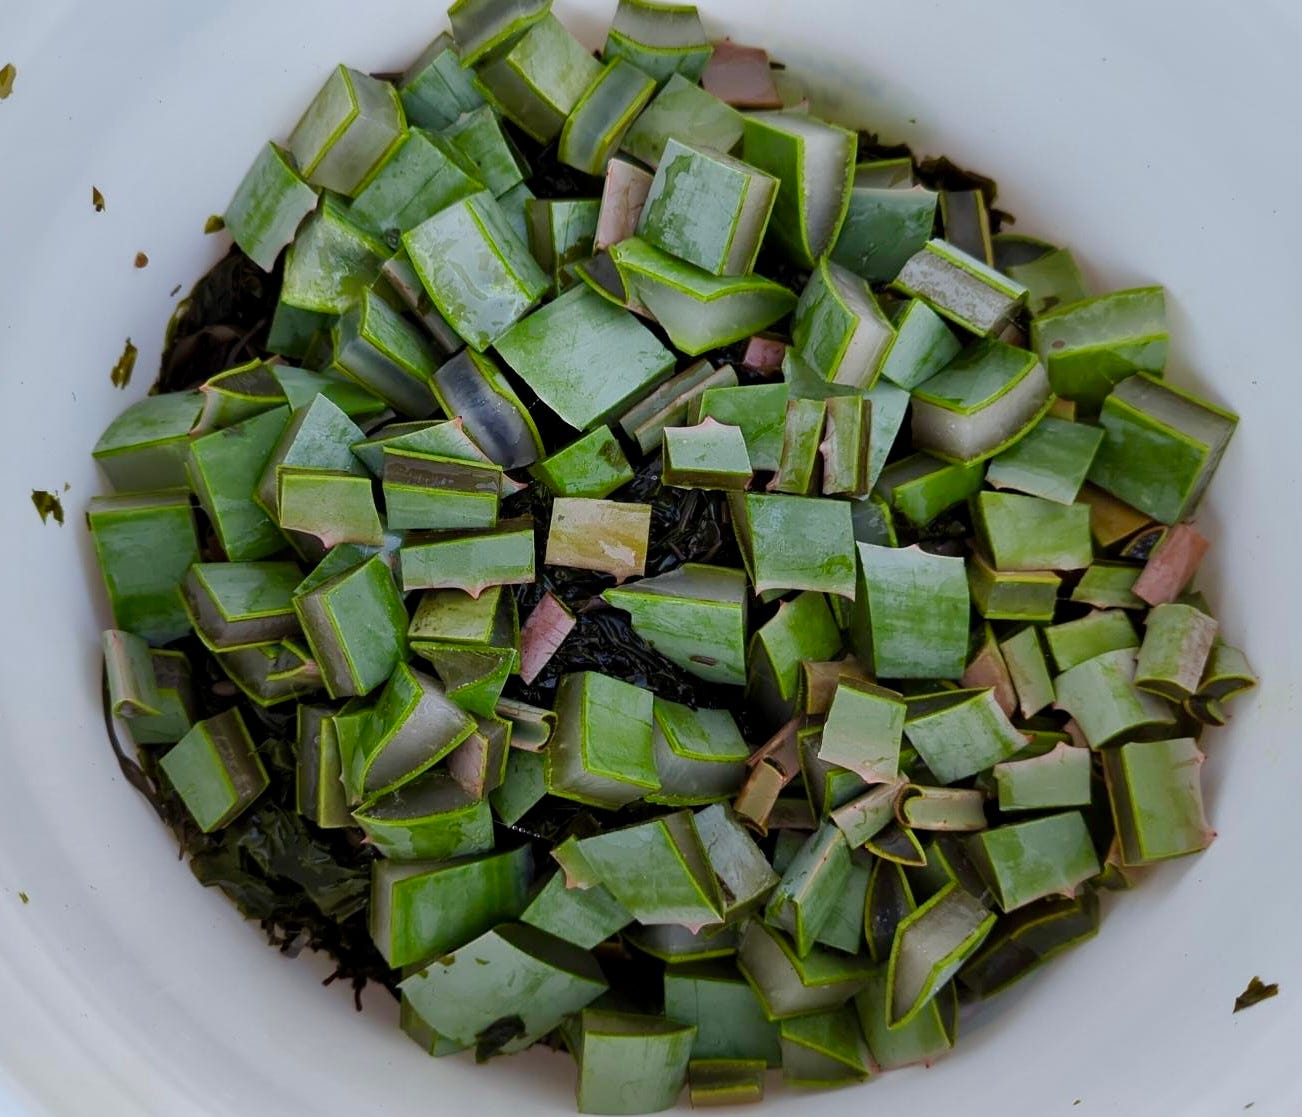
In this fermentation, I decided to add in some fresh aloe vera to bring in live enzymes and native microbes. So I layered the seaweed with some chopped up aloe blades I took from a plant in my garden.
I then covered it with well water and added in an amount of blackstrap molasses that was 35% of the total weight. The amount was arbitrary based on a gallon bottle I had lying around that I wanted to use up. (The original recipe was 17.5% of the weight of the seaweed.) I also added in a hefty splash of EM-1.
I was having problems with the aloe pieces wanting to float on the surface. I knew this could cause a mold issue. So I took whole aloe blades and sliced them in half vertically. I laid the whole halves, cut side down, on top of the material in the bucket to form a solid barrier and put a stone on top of them that almost filled the width of the bucket. This was to keep everything submerged below the top of the liquid to prevent mold. (If you are familiar with making sauerkraut, they often do a similar thing with whole cabbage leaves and a weight for a similar reason.)
Here it is after 1 week:
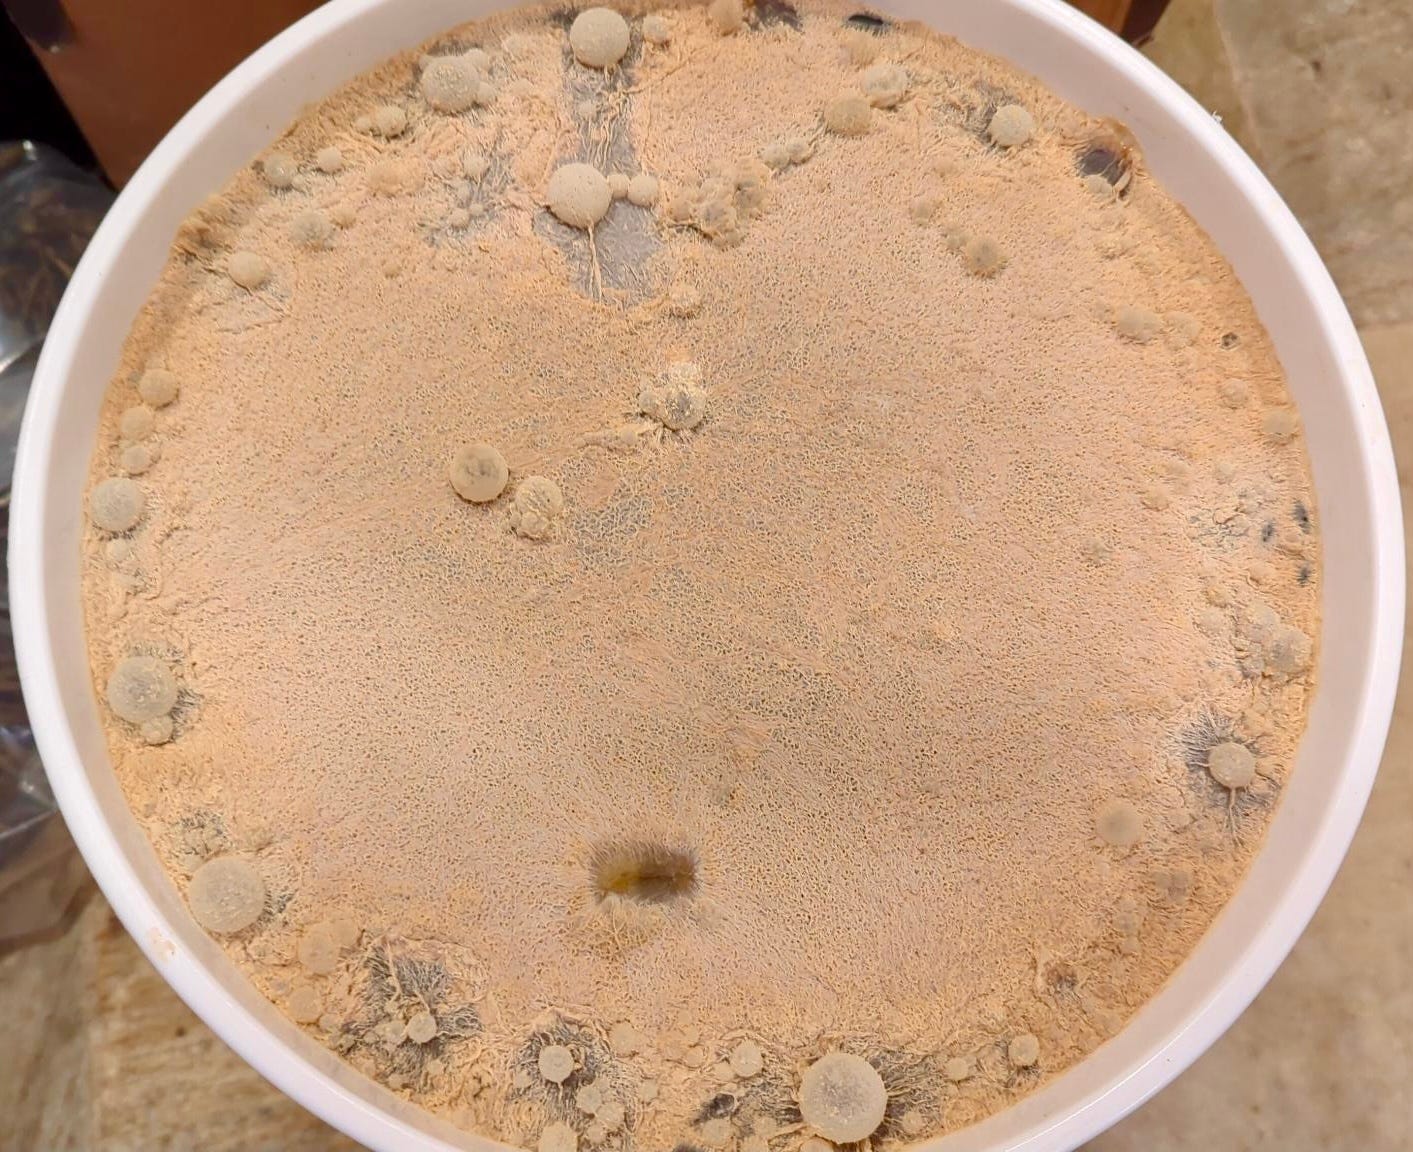
We have the EM-1 pellicle, but zero mold this time. Because I used large, whole pieces of seaweed, I am planning to ferment this one a longer time, probably 3 months.
A similar type of ferment is called Fermented Plant Extract (FPE). It typically ferments for about 2-4 weeks, and when making it, you know it is ready when the pH is between 3.5 to 3.7. These were not done exactly FPE style, but it is a good reference point for checking the pH of LAB and water-based ferments. This one has a lot more food than an FPE, so I feel it can go longer than the usual timeframe.
It really is hard for a ferment like this to go “bad”. Even if it does seem to, it still can be usable in the outdoor garden at high dilutions. This is because it is the nature of soil and plant environments to break down matter and use it as food. So you aren't ever really introducing anything that doesn't already exist in a natural growing environment. It is just that care should be taken when using it on your more precious cultivated plants that the pH is not too low, such as below 3.4, or if using it indoors when there are foul odors for personal comfort. If the pH is low, use a higher dilution. The water will raise up the pH to an acceptable level, especially if the water is hard.
Experiment 2: High Paramagnetic Rooting Medium
I was worried about this one, especially with the 100% basalt dust since it seemed extremely heavy and mucky. I did add water to these weekly since they seemed quick to dry out.
Within a week or two, we started having signs of top growth with swelling buds. After two full weeks, I did have stems pushing up through the medium on two.
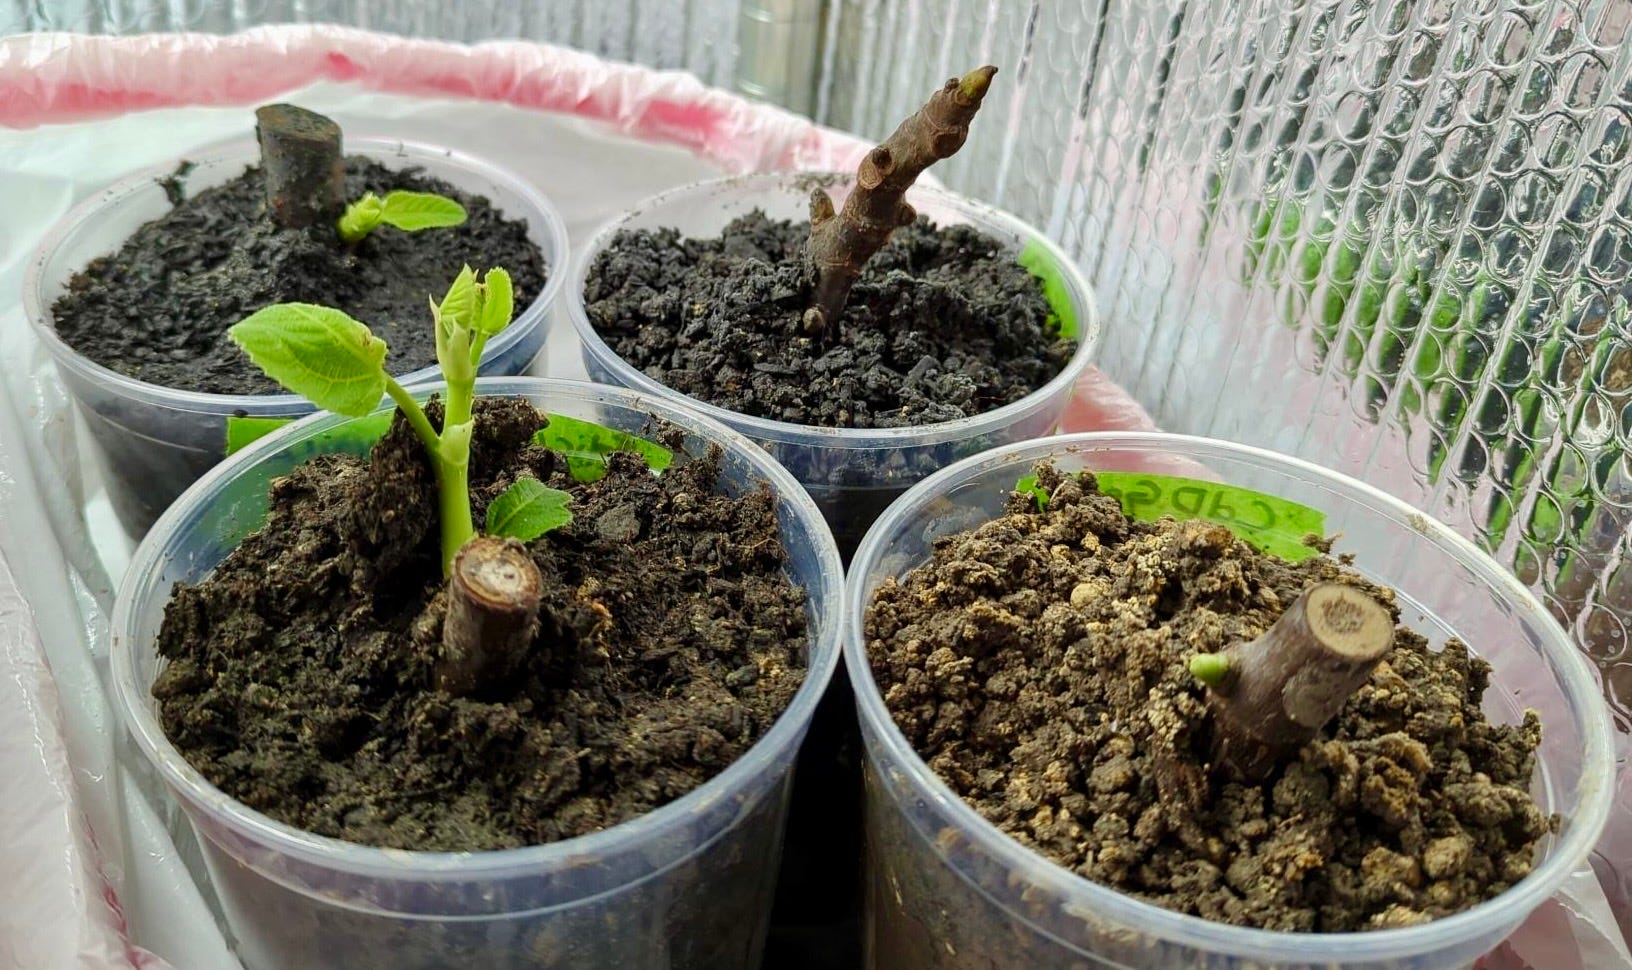
It did take 5 weeks for roots to show and these roots were gorgeous! The biochar ones were the first to root and they did the best overall, so much so that I think I will add biochar to all of my rooting mediums from here on out. These were the greenest and healthiest-looking plants out of all of the experiments.
We had one loss, which I predicted from the 100% basalt cup. I knew it was too dense as I was potting it and have some regret for not adjusting the experiment immediately. I found high levels of basalt were not ideal and it’s best to keep it to a minor amount since the one I have is so fine. A chunkier basalt would have been more ideal for this type of experiment.
This experiment did so well that I added 9 more cuttings with a different mix of equal parts biochar, basalt, pumice, coco coir, and perlite. All of these rooted, but I still feel the basalt was too high, so next year I will adjust. That biochar though is fantastic!
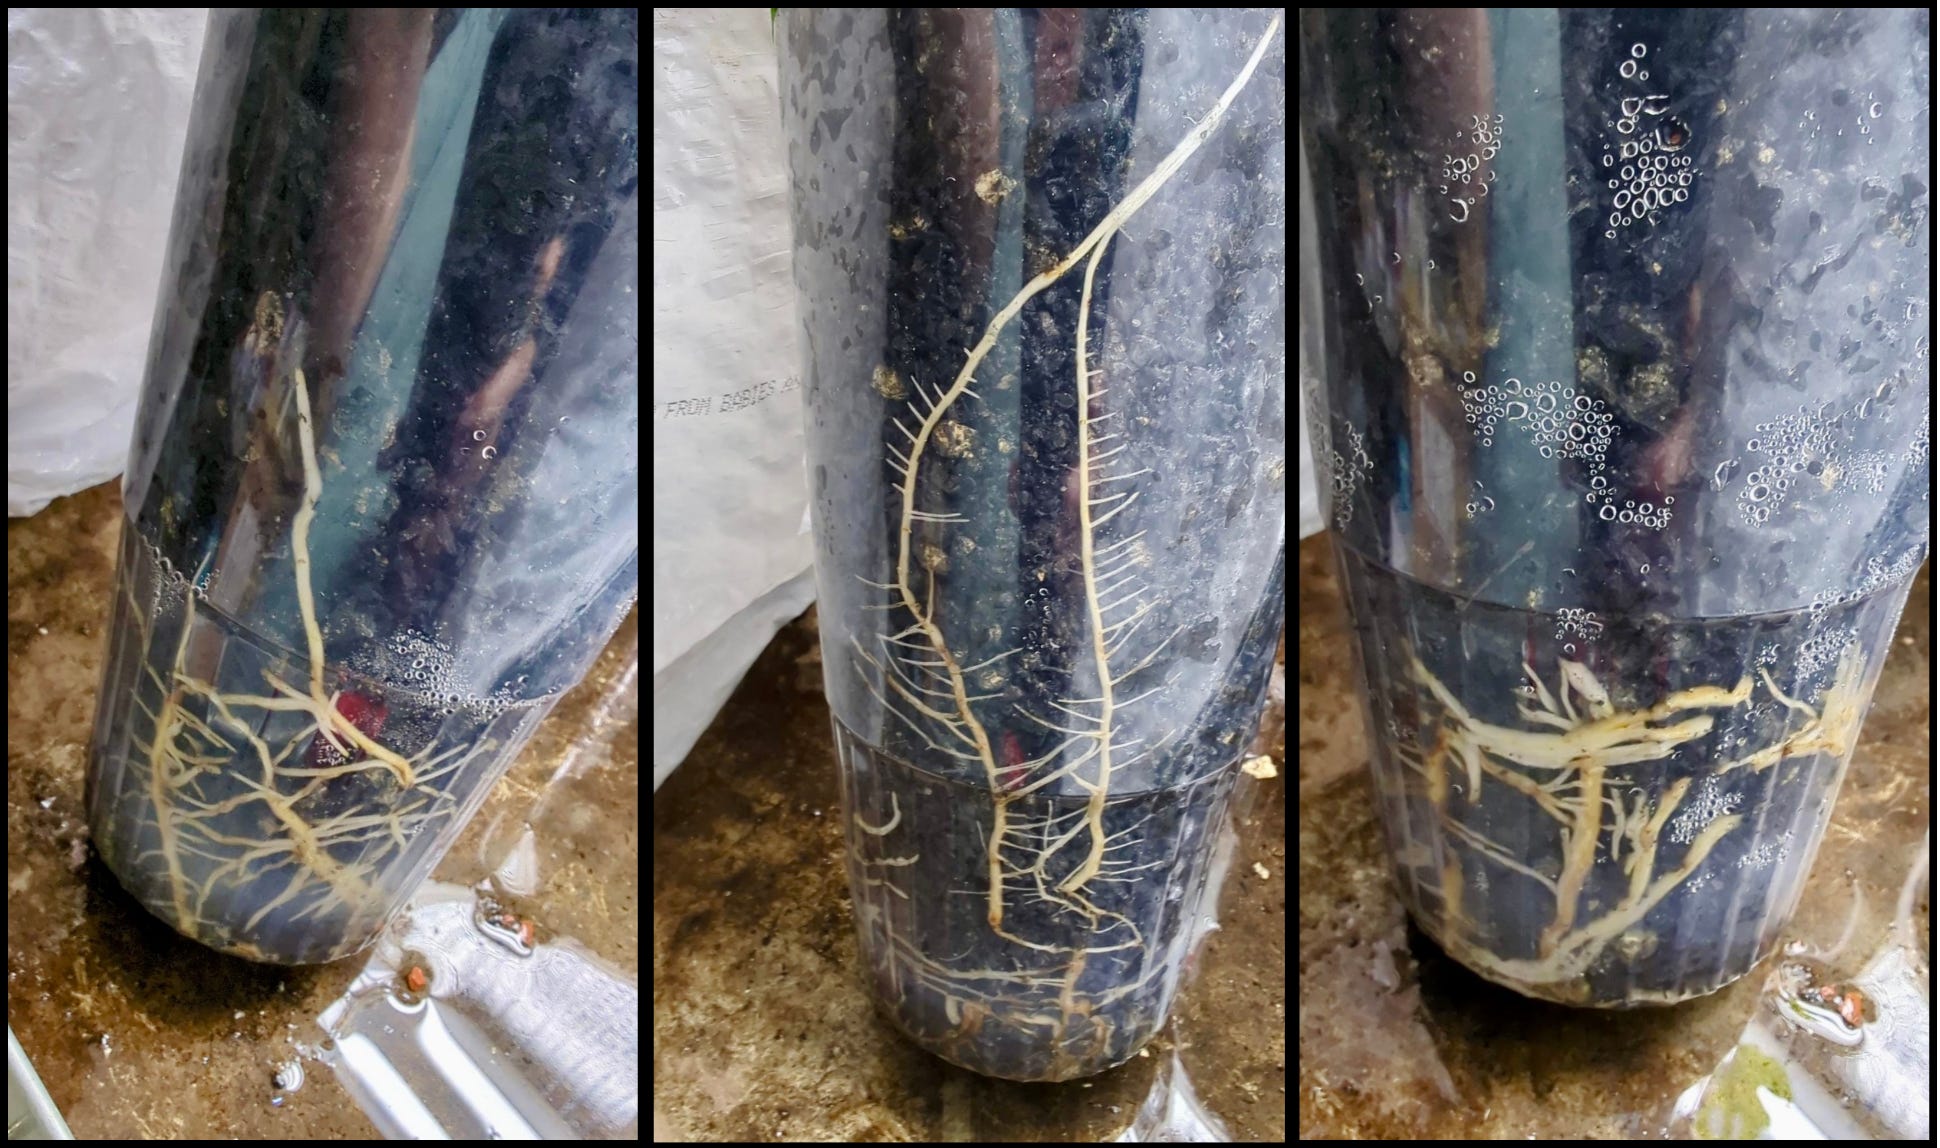
Experiment 3: Rooting In Particles
I feel the need to be very honest, I really dislike rooting in a high particle medium. 😅They are really hard for me to regulate the moisture with it being so dry here, and we had humidity issues. That said, all rooted and all are still alive. I just will not be choosing this again because it is so high-maintenance for me and the results did not surpass other methods.
The calcined clay one was the first to root at 5.5 weeks., followed by the diatomaceous earth, then the Akadama after 6 weeks, and last was the zeolite after 7 weeks.
Even though the calcined clay one rooted first and does have a decent root system, I think that the diatomaceous earth one has the best root system overall. It did take these guys a longer time to get the roots going well though. These also aren’t the healthiest plants out of all of the experiments, there are definite deficiency issues. I think because of the nature of the particles, they are not the best at holding in nutrients and so need constant nutrition. The source of the cuttings also has a huge bearing on this as well. This particular source has often had cuttings with nutrient issues in my experience with them over the years and so that may also have had an effect on the results.

Experiment 4: Natural Growth Regulators
I’m going to be straight with you, this one bombed in my opinion and is probably deserving of a redo. I blame the small number used in the experiment and that they were all from one source. I’m not sure if something happened to this batch of cuttings, they did collect a lot of heat at one point, but all of them took a long time to root. None from the coconut water batch rooted, one from the all aloe did not root, and one from the coconut water + aloe did not root. All others eventually rooted. The seaweed ones all rooted after 4 weeks and were the first to root.
Seaweed for me has been a great rooting stimulant and even though this experiment was not perfect, I think it still shows the help seaweed can give when there are issues. Seaweed will continue to be my go-to for starting cuttings and I will save the others to use later as boosts.
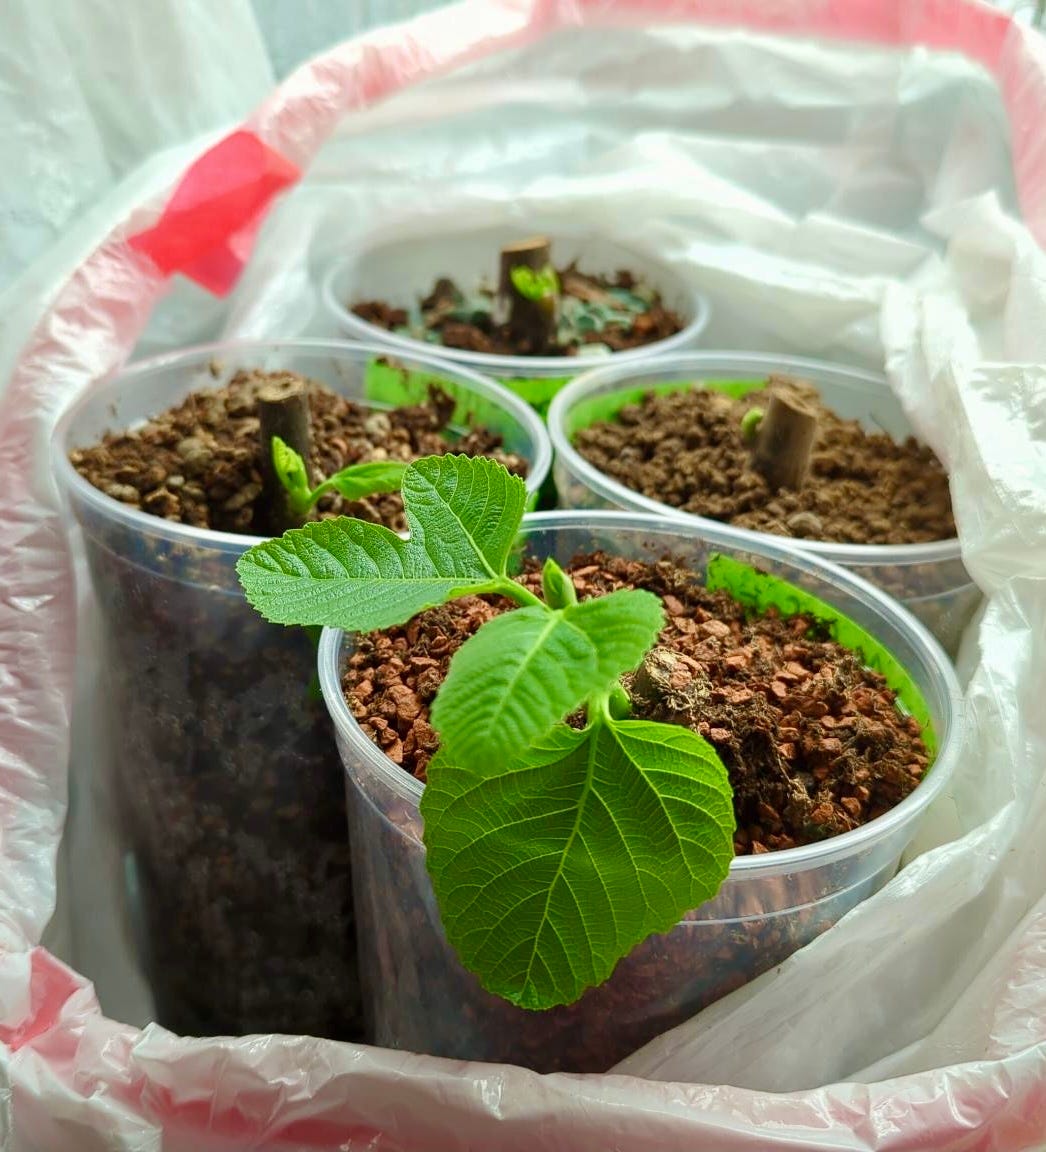
Experiment 5: The 50/50
This one was interesting. It really revealed to me how much of a difference the way trees are grown and the timing of cutting collection has a bearing in how well they root. A lot of the success seems to be dependent on this. I used two different sources for these cuttings, all from one rooted immediately and had green, lush growth; the others took a long time to root and had signs of deficiency immediately. This was true across the different substrates and seaweed products. The source seemed more important than the rooting medium.
In this experiment, all rooted with just one loss. Here are the stats:
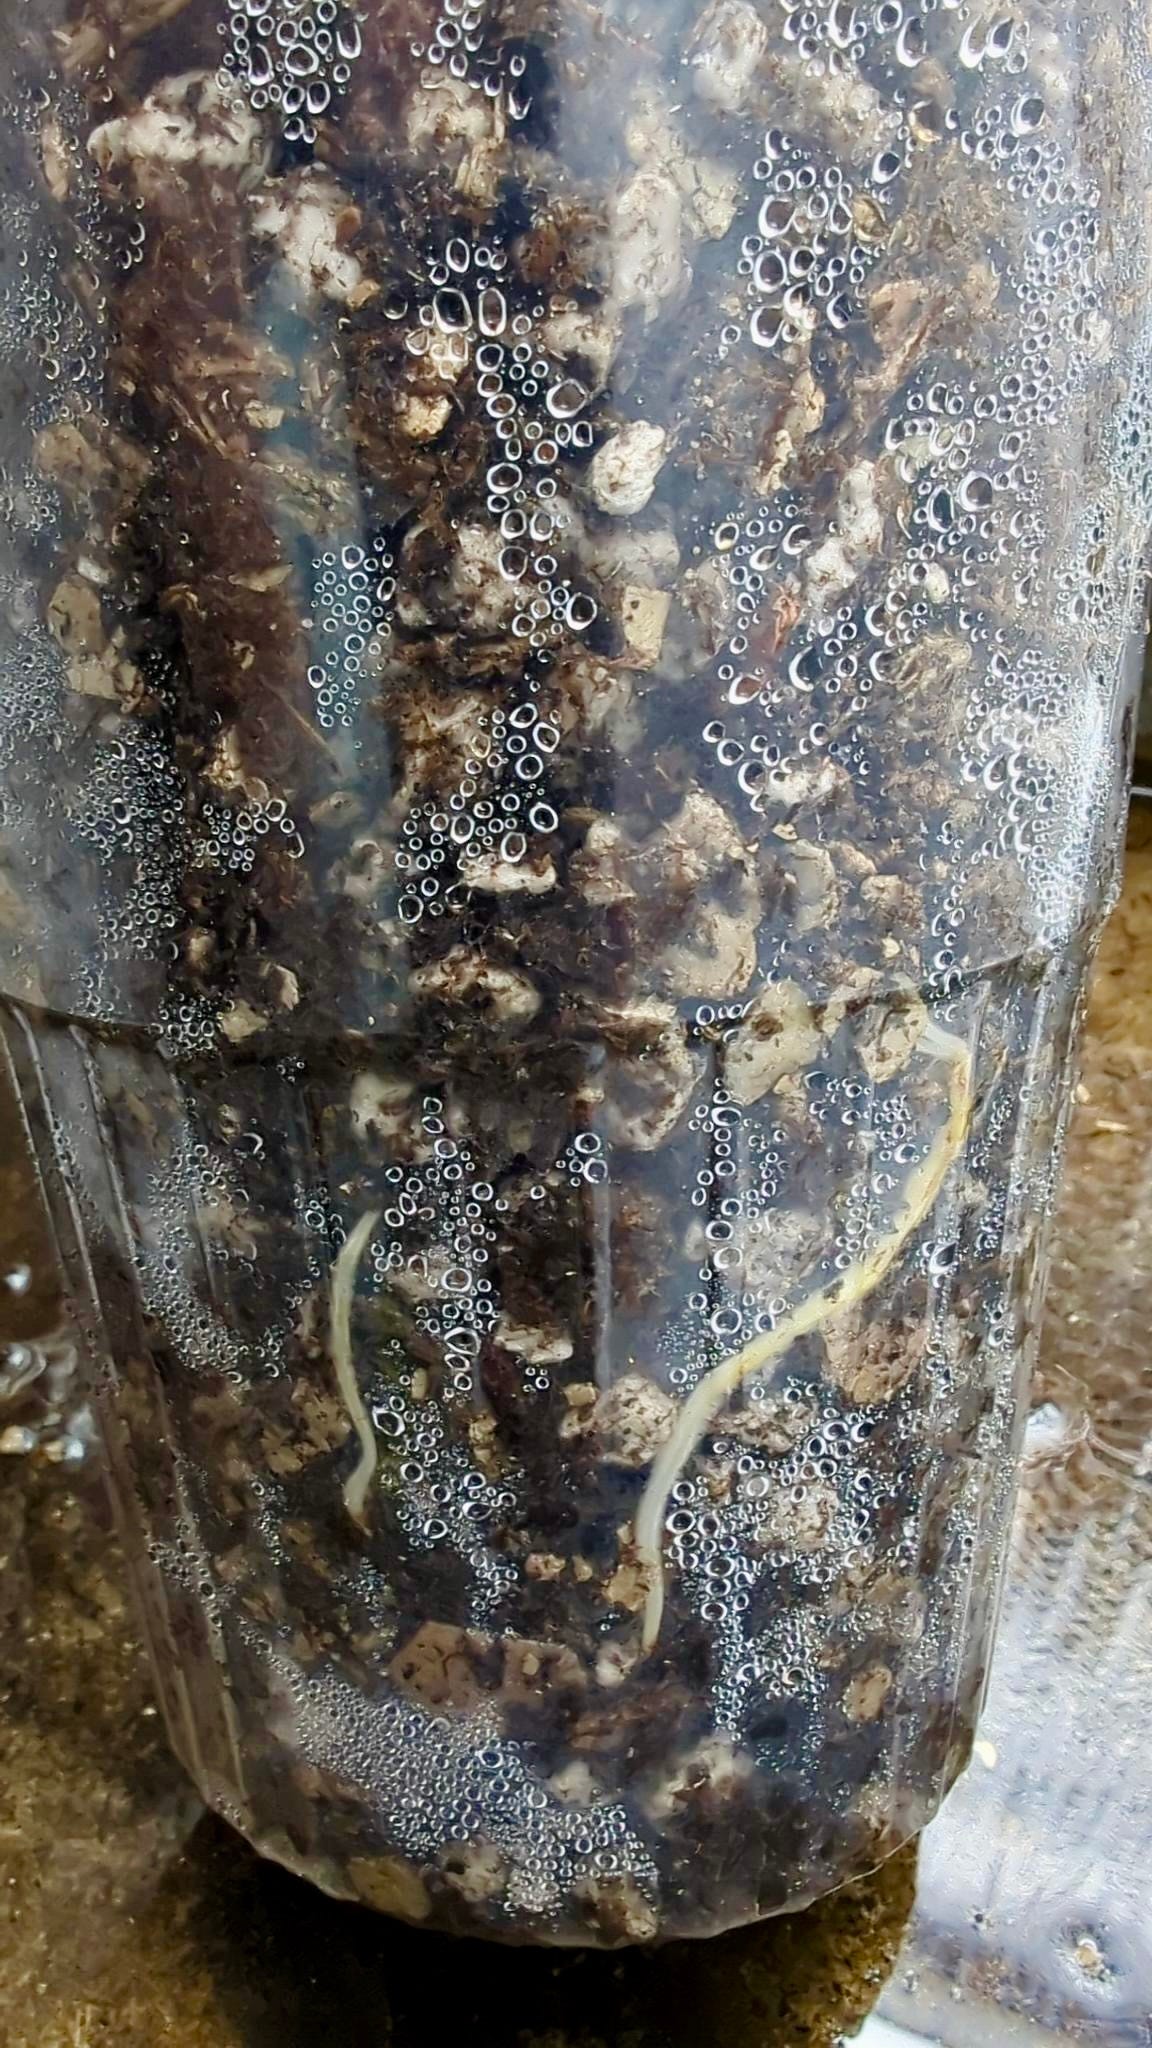
First to root were soaked in the seaweed ferment from experiment 1, quickly followed by the ones soaked in Kelpak. The difference was just 2 days between them. The last to root and the poorest performing overall for growth quality, along with our only loss, were soaked in Bloom City.
The first to root of the substrates were the peat and coco coir combos with perlite, with the majority to first root being in peat. The last to root and the poorest performing by far were the ones in vermicompost and perlite. The ones in sand & perlite all had finer and thin roots. The vermiculite and perlite combos were mid across the board.
The ones soaked in and fertilized with sparkling water did great! There was some evidence of deficiency though in one of the plants, but it outperformed Bloom City by a long shot.
Overall, this experiment did well. I recommend the seaweed ferment if you have time to make it. If not, Kelpak is a great product for rooting. Powdered water-soluble seaweed products, Grow More, and Maxicrop are all midline products that do well. I did not like Bloom City at all and don’t recommend it at this time.
For rooting substrates, 50/50 peat and perlite seems to be the most desirable. This is closely followed by coco coir and perlite. The others all did great too, though I would not recommend a compost product as that did the worst for me.
Performance was evaluated by rooting speed, root quality, and plant health.
The Control
What you may not know is that I also did a control group. I followed my usual rooting routine. I soaked the cuttings for 72 hours in fig FPJ and seaweed, changing out the water each day. I rooted them in a 1:1:1 combo of peat, pumice, and vermiculite. I am pleased to say that this one performed the best overall. I had 100% rooting success. The cuttings rooted quickly starting at 2 weeks, with all rooted after 3 weeks. Roots looked great and growth was great. I played around with water to test their limits and I could not kill these, neither with overwatering nor with under-watering. That did create some issues with the plants for which I had to correct, but they all rebounded well.
After all of these experiments, I ultimately arrived at the conclusion that my original way is the best way for me. I’m just going to add in some biochar to my mix when I can. I definitely prefer treepots to clear cups and will stick to those in the future as well. They are superior for bottom watering, for protecting the roots from lights, and for keeping long-term until I am ready to up-pot.
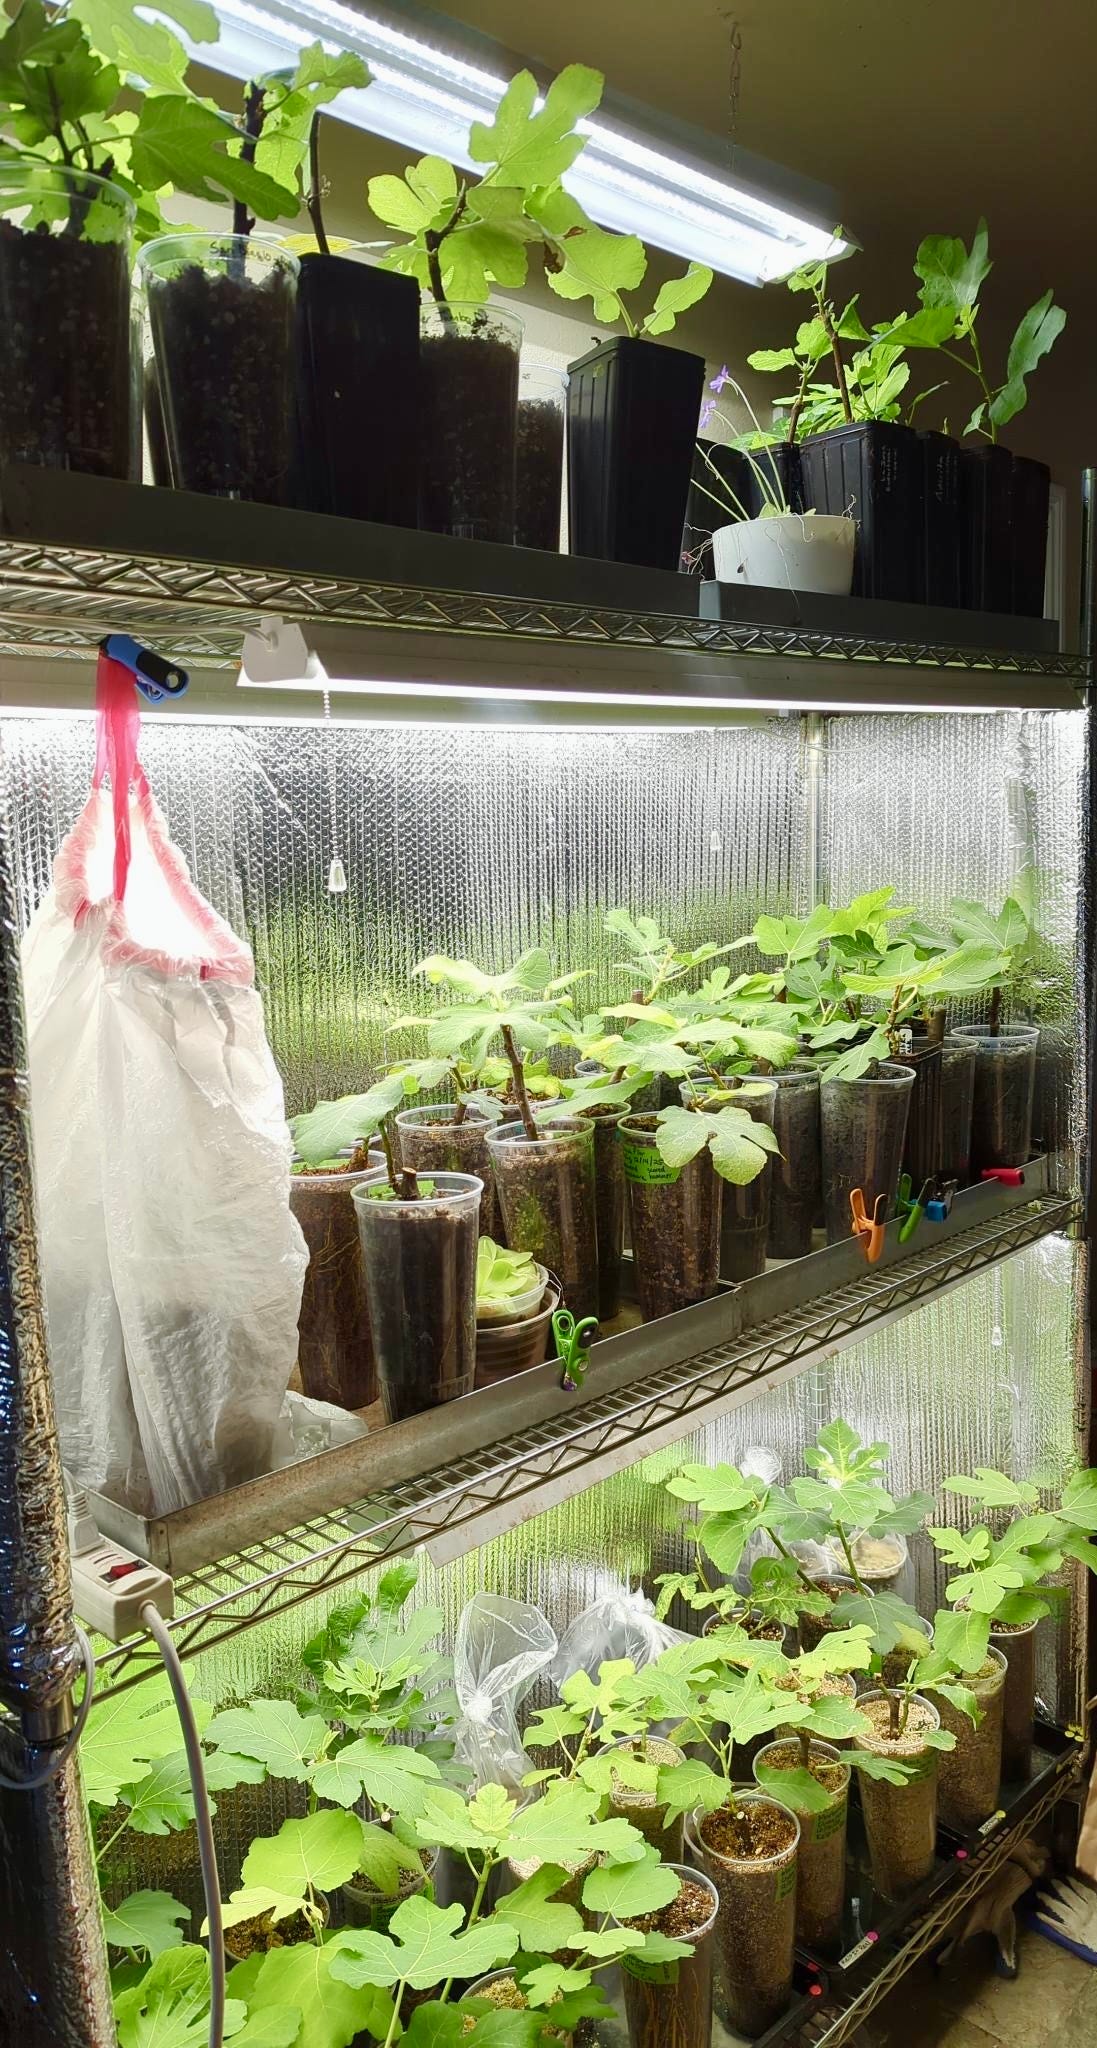
With all said and done, I now have a ton of plants that need up-potting. Six losses and 71 successes, well, that’s not bad in my book! A 92% success rate even with the experiments and neglect from being insanely busy at work.
Hope you all had a fantastic season of rooting this winter! And I hope that this mass of information helps you in some way with future fig rooting endeavors!
This was a quick update, so let me know if you have any questions or if I missed a particular detail you would like to know about in the comments!
Winter Experiments Playlist—To close the series out:
We are in spring now and the trees are waking up! What is this season going to bring? I can’t wait to find out!

Really appreciate you sharing this
What I’m taking away more than anything is how much of the season is already decided before it even starts. Not just whether trees make it through winter, but how cleanly they come out of it and settle into growth.
It kind of reframes things even more for me…less about what we do in summer, and more about how stable we keep the system earlier on. Water, temperature, root conditions… all that quiet stuff that doesn’t get much attention but shows up later in the fruit.
Makes me think a lot of what we chase during the season is really just the result of what happened months before. Really valuable work here.
Thank you for sharing! I love getting all the updates on your blog.